If you’re attempting to use fastboot commands on your computer to interact with your Android device, encountering the dreaded “Fastboot Device Not Found” error can be frustrating. This error typically occurs when the necessary fastboot drivers are not properly installed on your computer. In this guide, we will walk you through the process of installing fastboot drivers to fix the “Fastboot Device Not Found” error. Let’s get started!
Understanding the Fastboot Mode and Drivers
Before we proceed, let’s have a quick overview of fastboot mode and the importance of fastboot drivers:
- Fastboot Mode: Fastboot is a protocol that allows you to communicate with your Android device’s bootloader. It provides a way to execute commands, flash firmware, and make modifications to the device’s system partitions.
- Fastboot Drivers: Fastboot drivers are essential software components that enable your computer to recognize and communicate with your Android device in fastboot mode. Proper installation of these drivers is crucial to ensure a seamless connection between your device and computer.
Installing Fastboot Drivers on Windows
Step 1: Download the Android SDK Platform Tools
Step 2: Download ADB and Fastboot drivers
Step 3: Enable USB Debugging on Your Android Device
On your Android device, go to “Settings” > “About phone” and tap on the “Build number” several times until you see a message confirming that you are now a developer. Then, go to “Settings” > “Developer options” and enable “USB debugging.”
Step 4: Put Your Device into Fastboot Mode
Power off your Android device. Then, while pressing and holding the appropriate key combination (varies by device), boot your device into fastboot mode. This combination usually involves pressing the Power button and Volume Down button simultaneously.
Step 5: Installing the drivers
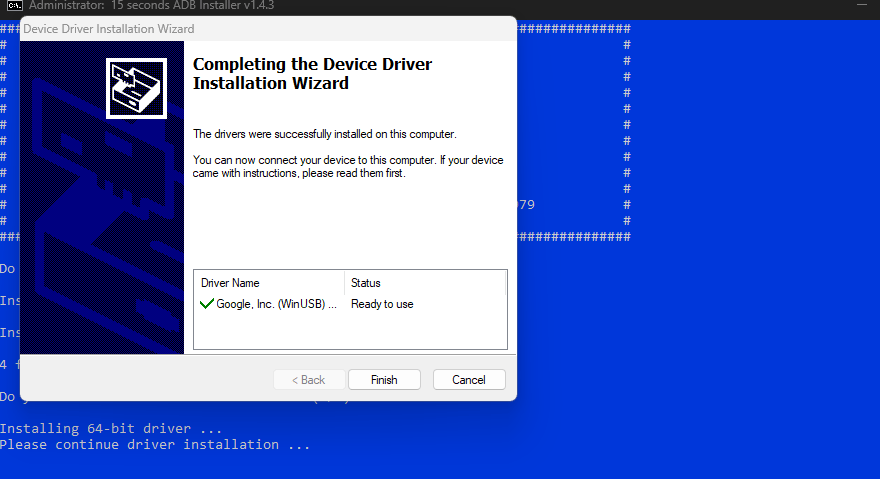
Extract the downloaded adb-setup-1.4.3.zip and run adb-setup-1.4.3.exe file, follow the on-screen instructions to install the drivers.


Step 6: Install the Fastboot Driver
In Device Manager, locate your Android device under the “Other devices” or “Portable Devices” section. Right-click on it and select “Update driver” from the context menu, then select ” Browse my computer for drivers ” under manufacturers find Google and select “fastboot Android interface” Follow the on-screen prompts to complete the driver installation process. Once finished, the fastboot drivers will be installed on your Windows computer.


Verifying Fastboot Connectivity
After installing the fastboot drivers, it’s crucial to verify the connectivity between your Android device and computer in fastboot mode:
Step 1: Open Command Prompt
On your computer, press the Windows key + R to open the Run dialog box. Type “cmd” and press Enter to open the Command Prompt.
Step 2: Navigate to the Android SDK Platform Tools Directory
In the Command Prompt, use the “cd” command to navigate to the directory where you extracted the Android SDK Platform Tools.
Step 3: Enter Fastboot Command
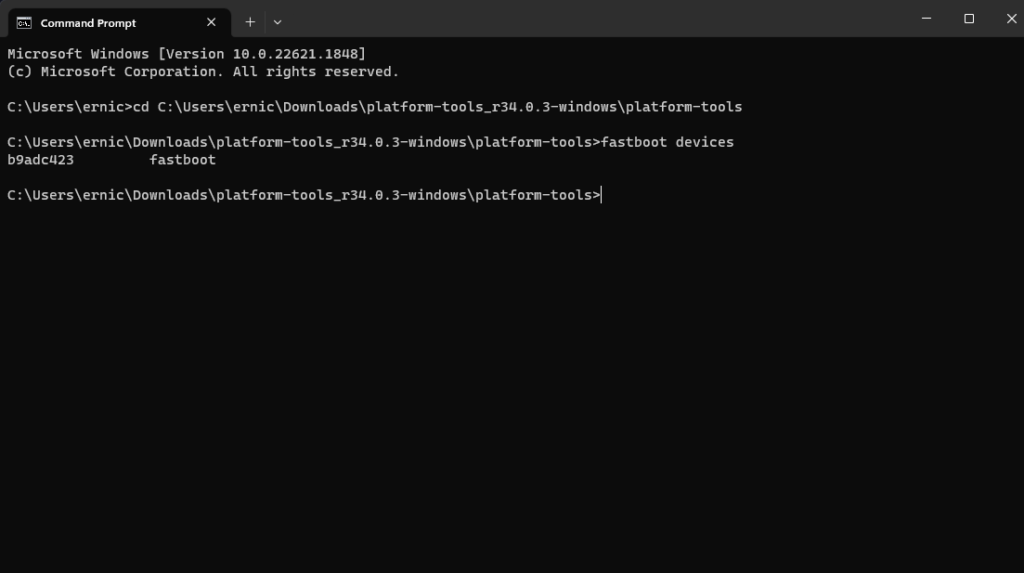
With your Android device in fastboot mode and connected to the computer, enter the following command in the Command Prompt: “fastboot devices”
Step 4: Verify Fastboot Connectivity
If your device is properly connected and the fastboot drivers are installed correctly, you should see your device’s serial number along with the “fastboot” message in the Command Prompt.

Final Thoughts
By following this guide and properly installing the fastboot drivers on your Windows computer, you can resolve the “Fastboot Device Not Found” error and establish a successful connection with your Android device. Remember to download the Android SDK Platform Tools, enable USB debugging on your device, and follow the step-by-step instructions provided. With the fastboot drivers installed, you’ll have full control over your device in fastboot mode, allowing you to execute commands and perform various tasks with ease.


5 thoughts on “How to Install Fastboot Drivers: Fixing “Fastboot Device Not Found” Error”